WhiteLabels screen
On this screen you can view all WhiteLabel brokers and manage their main settings.
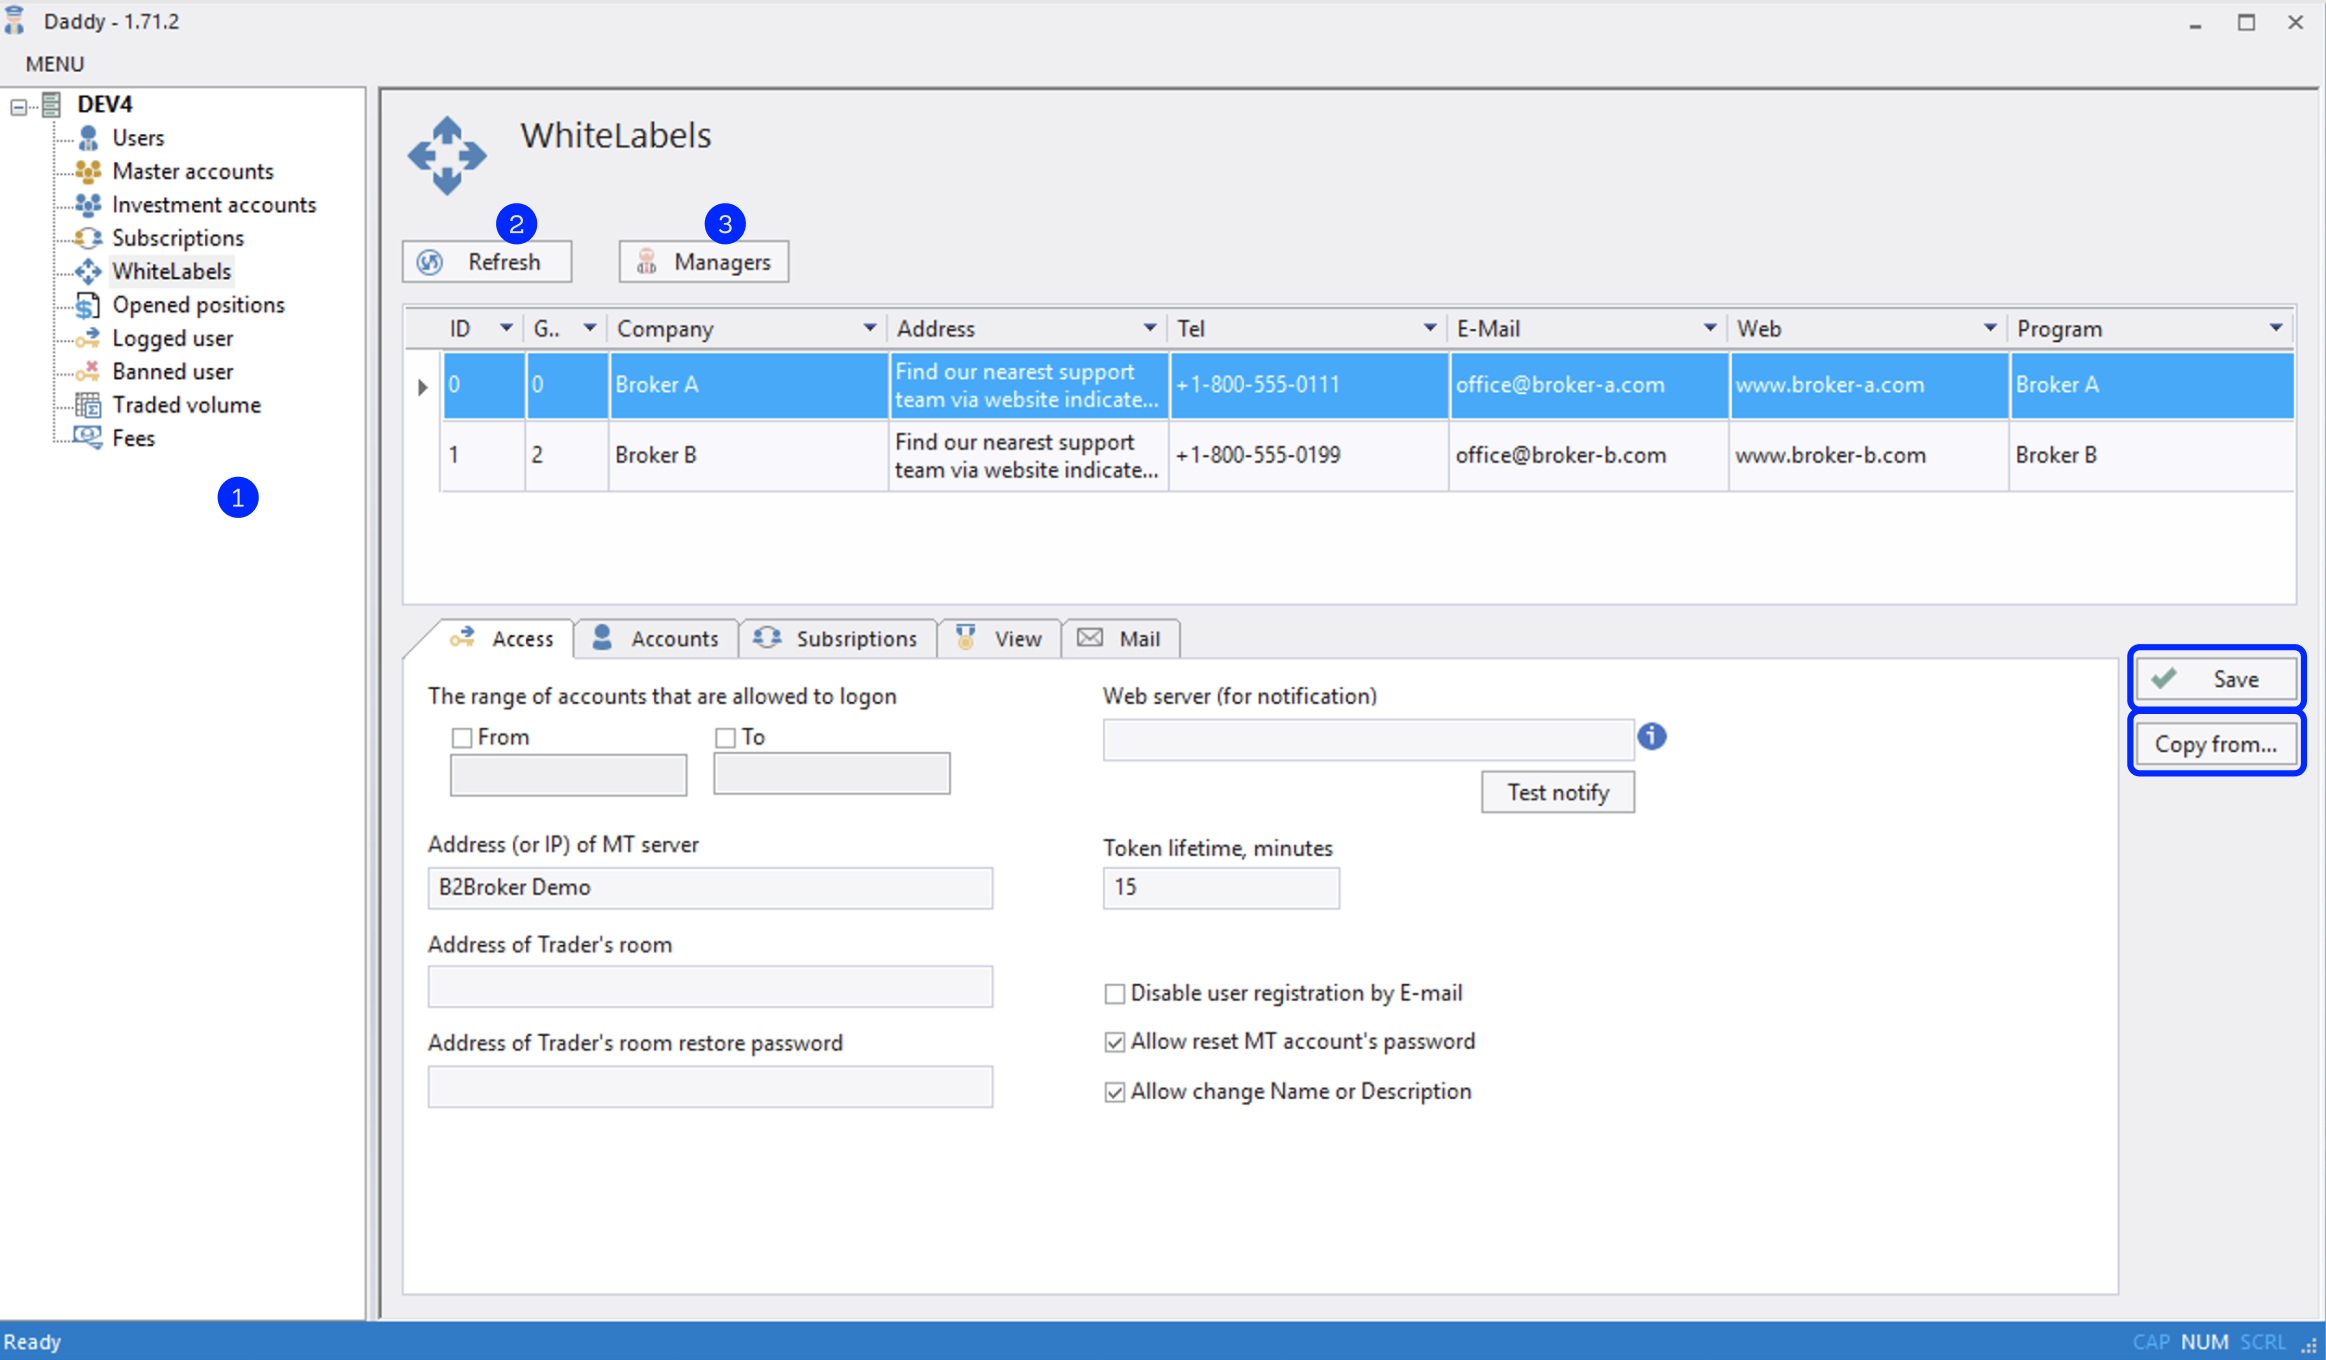
Sidebar menu.
Refresh button.
Managers button for access to B2Broker Manager App.
To activate the settings field, click on the required WhiteLabel at the top of the screen.
After the changes are implemented, click the Save button on the right.
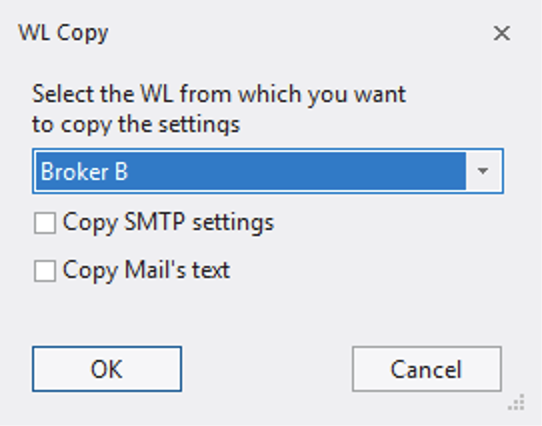
Also you are can copy all settings from another WhiteLabel, including SMTP (Simple Mail Transfer Protocol) settings and Mail’s text.
Access
On this page you can view all settings related to access configurations.
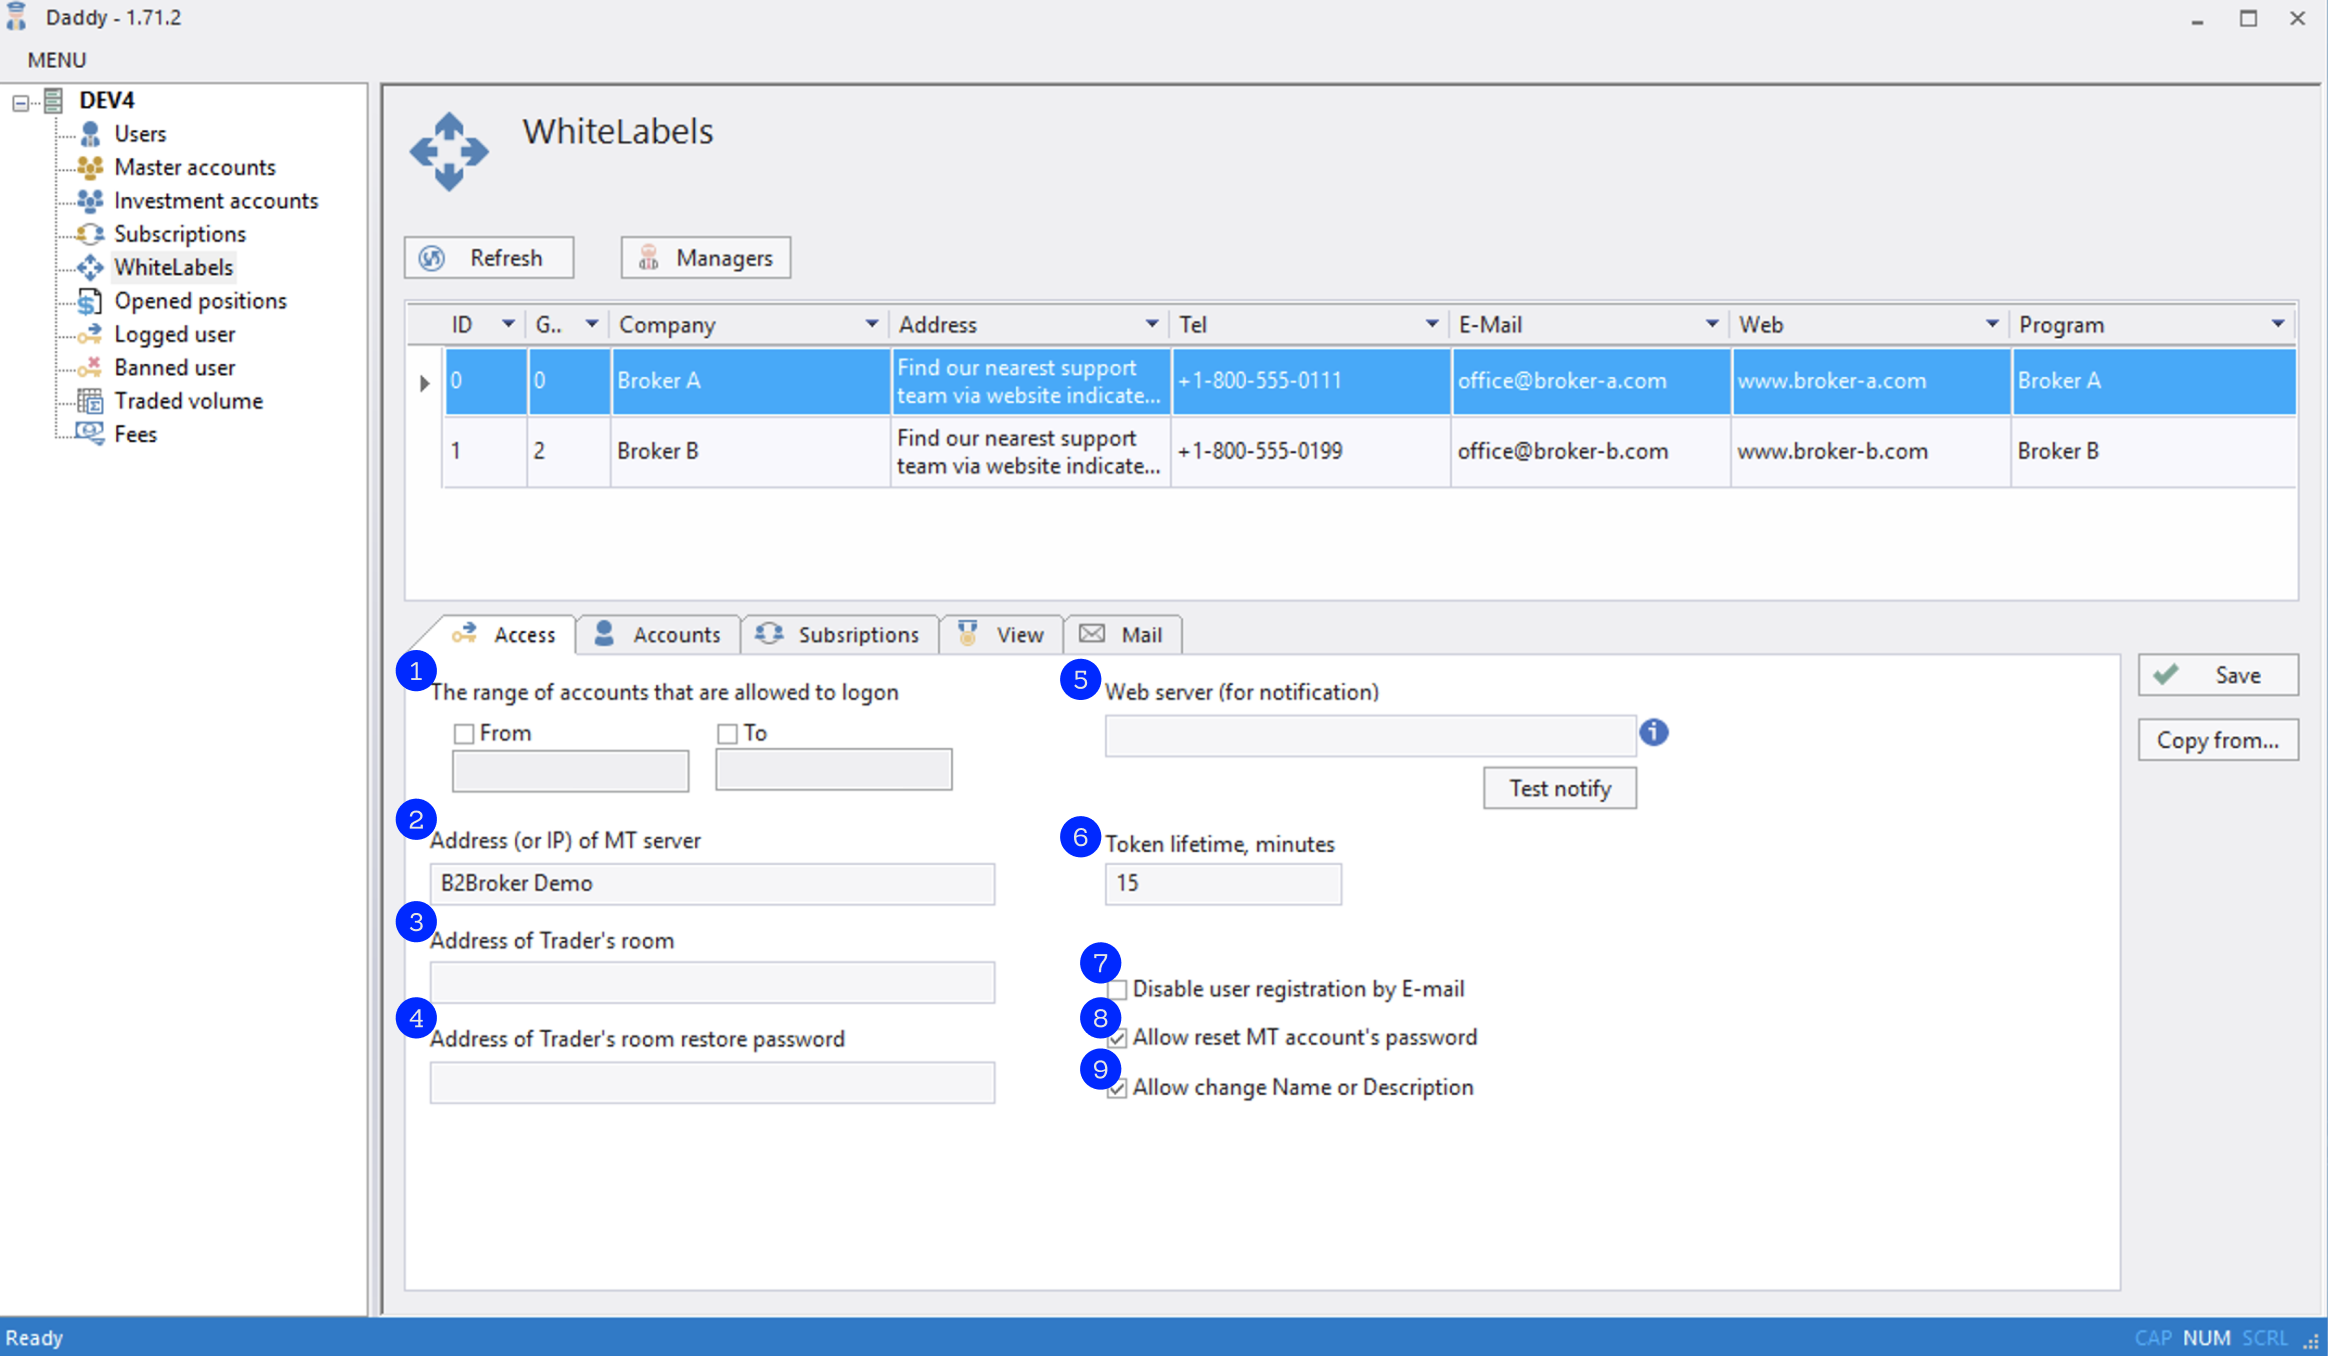
The range of accounts that are allowed to logon to the web-interface.
Address (or IP) of MetaTrader server.
Address of Trader’s room.
Address of Trader’s room restore password.
Web server (for notification) — address for sending balance and trading notifications.
Token lifetime, minutes — time period when the token is valid.
Disable user registration by E-mail checkbox.
Allow reset MT account’s password.
Allow change Name or Description of accounts.
Accounts
On this page you can view all settings related to accounts and their work.
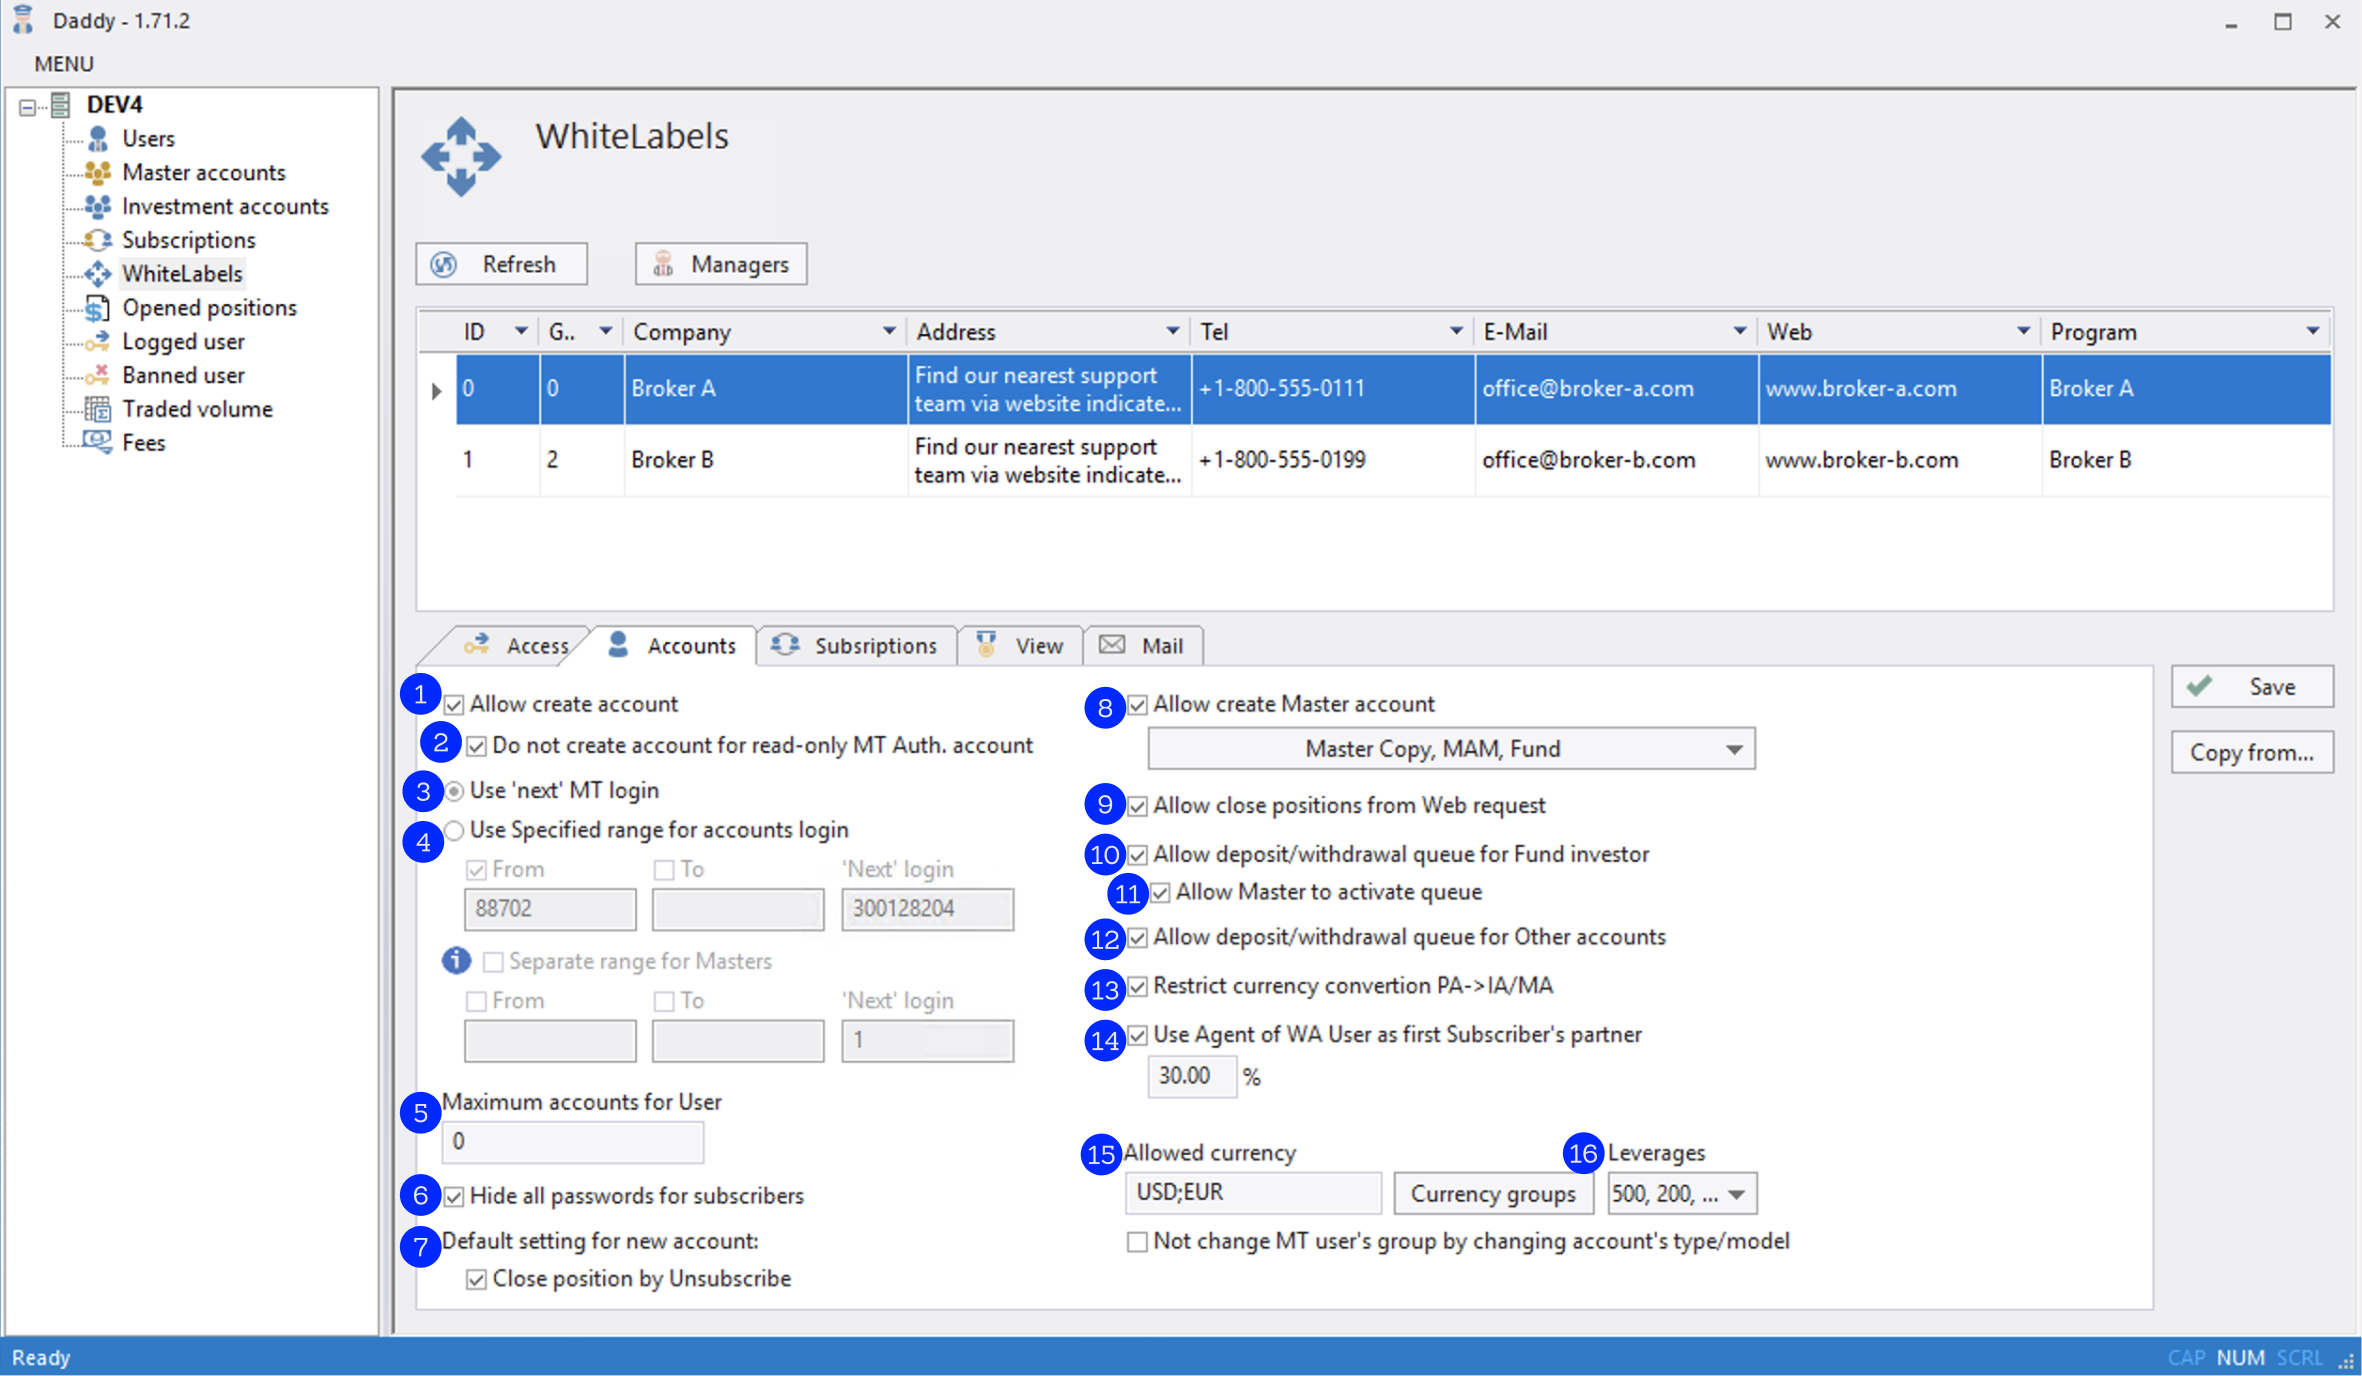
Allow create account — allows clients to create new accounts on their own.
Note
If inactive, the buttons for creating new accounts will be hidden in the web interface.
Do not create account for read-only MT Auth. account — restrict clients to create accounts if their MT payment account is read-only (without ability to trade).
Note
Usually, Read-only status is assigned to accounts with minimal deposit.
Use ‘next’ MT login — use the method of naming accounts that automatically sets the next number after the previous one created.
Use specified range for accounts login — use the range in which new accounts can be created.
Note
If all groups are unavailable to managers who connect the service to the MT, you have to specify the range.
You can also set separate range for Masters, for example, to be able to identify them easier.
Maximum accounts for User — maximum number of accounts that can be created by one client.
Hide all passwords for subscribers — if the checkbox is active, the passwords for subscribers won’t be visible in the web interface.
Allow become Signal (Master) account — make social trading available.
Allow become Manager of subscription properties — make MAM-accounts available.
Allow become Fund account and receive investments — make PAMM-accounts available.
Allow close positions from web requests — allow to close trades on copy trading accounts via web interfaces.
Allow deposit / withdrawal queue for Fund investor — allow to deposit/withdraw the funds for PAMM accounts.
Note
If inactive, the buttons will be hidden from the web interface.
Allow deposit / withdrawal queue for Other accounts — allow to deposit/withdraw the funds for MAM and Copier accounts.
Show day risk / Edit — show loss limit for masters in web interfaces.
Show ‘hide from rating’ — show in web interfaces a setting to hide accounts from the Leaderboard.
Account currency — set up account currency.
Currency groups — set up groups for each account type.
Note
You may choose only from those groups that are available to MT managers through which the platform connects to MT.
After adding a group to a Manager, you have to restart the dapli service.
Leverage (here: 100) — setting of leverage which clients may select when creating accounts.
Subscriptions
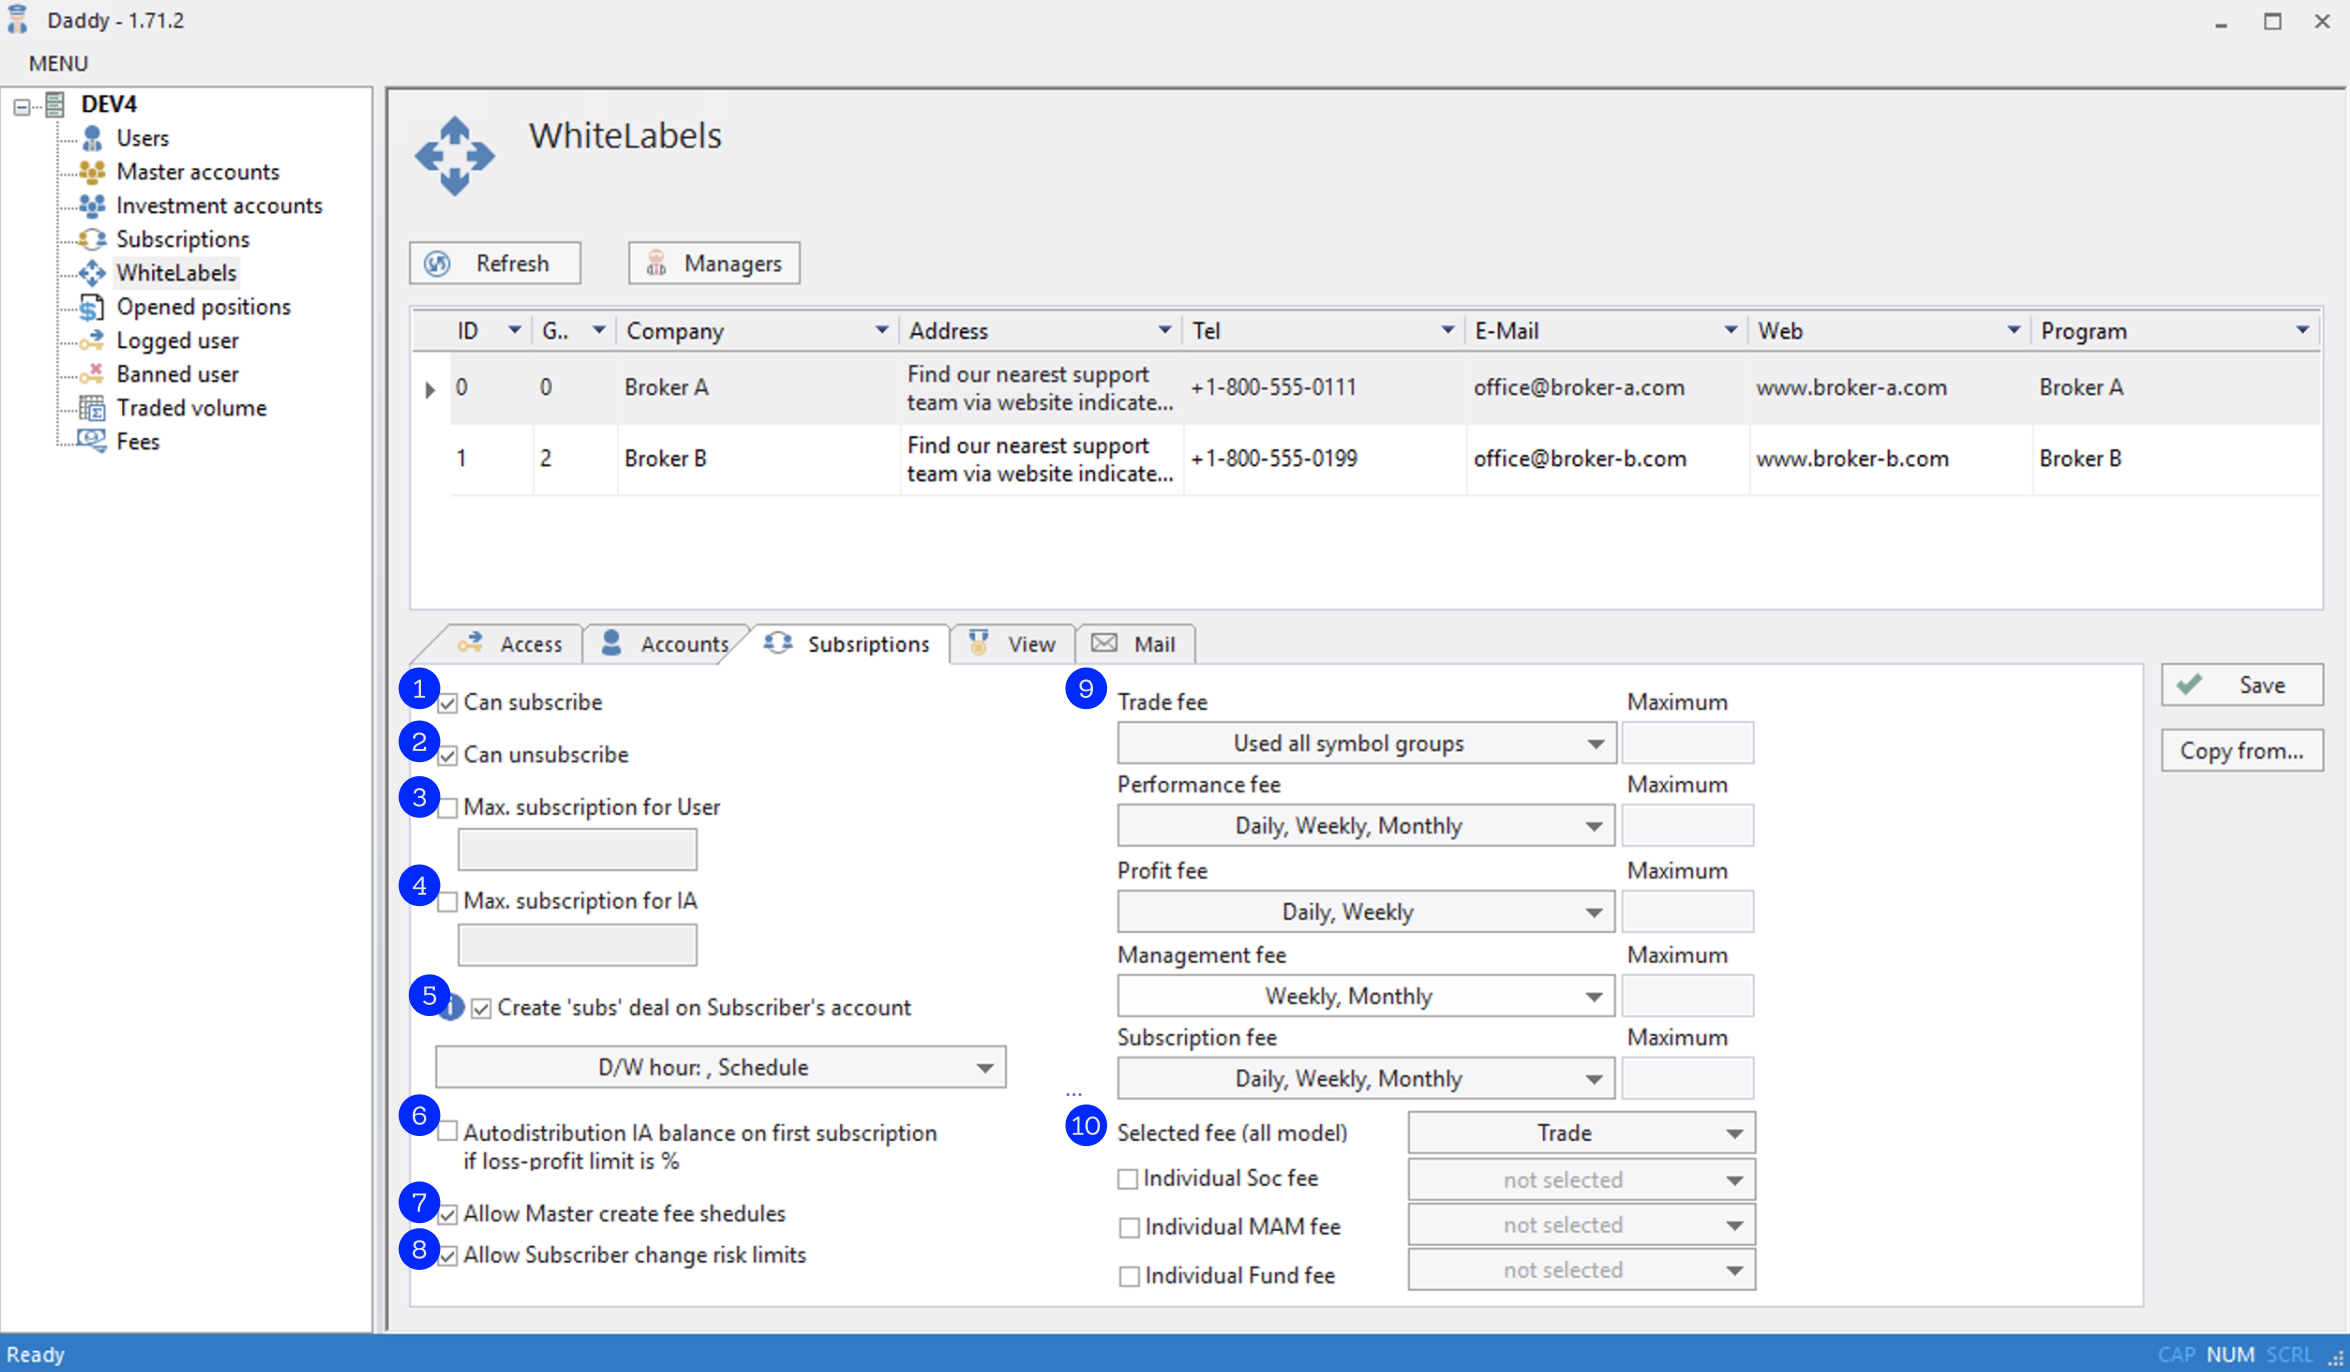
- Max Subscriptions for IA
Maximum number of subscriptions per investment account
- Max Subscriptions for LA
Maximum number of subscriptions for all accounts tied to one authorization/payment account
- Setup fee
Entrance fee (subscription)
Note
Absent in web interfaces.
- Show Trade fee
Show and allow to edit the rewards for volume
- Show performance fee
Show and allow to edit the rewards for success
- Show profit fee
Show and allow to edit reward only with profitable trades
- Show management fee
Show and allow to edit remuneration for management
- Hour
Setting of rule for PAMM Account Rollover (how and when clients’ funds are deposited and withdrawn)
Description of options for time selection rollover setting:
Manual — only upon confirmation of a trader in the web interface or confirmation of a broker in the admin panel/Manager application
Immediately — all deposits/withdrawals will be carried out instantly after application on deposit/withdrawal is created by a client
Hour — on schedule
View
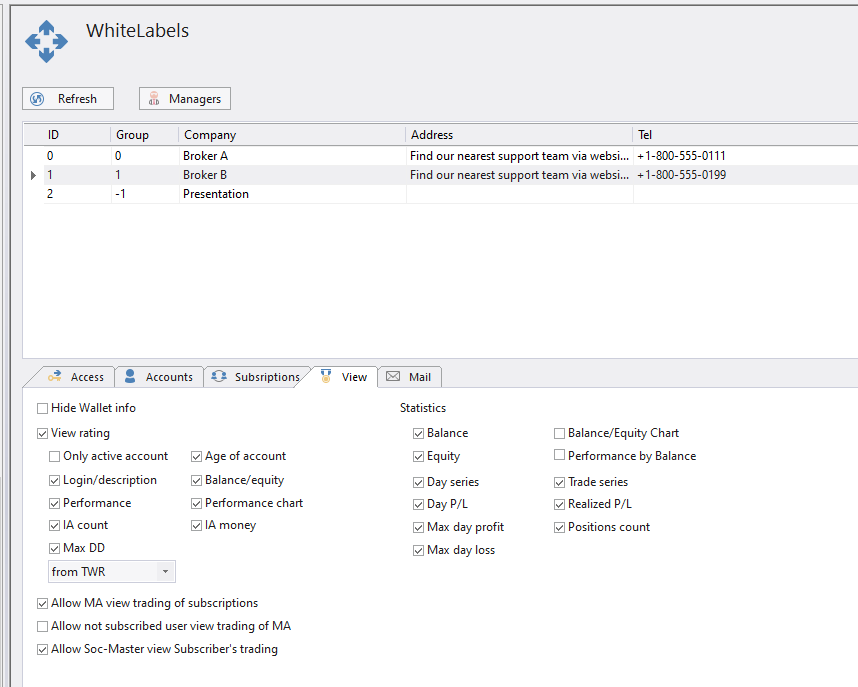
On this screen you can manage web interface settings.
- Hide WA info
Remove a payment account from the web interface
- View Rating
Show/hide ranking (leaderboard) in the website menu interfaces
- Only active accounts
Show only active accounts (which have had trades in the last 60 days)
- Login / description
Show login and account description in rating
- Performance
Show profitability in rating
- IA count
Show number of subscribers
- Max DD
Show maximum drawdown
Note
You can also choose a formula for calculation: from invested funds or from a high watermark in terms of profitability.
- Age of account
Show account’s age
- Balance / equity
Show a balance-equity on the statistics page
- Performance chart
Show a graph of yield
- IA money
Show amount of subscribers money
- View subscription
Show traders the number of investors subscribed to them
- View MA trading
Show trader’s deals
Below you can find description of fields of the Statistics section:
- Balance
Show account balance
- Float P/L
Show floating profit
- Day P/L
Show number of profitable and unprofitable days
- Max day profit
Show maximum profit per day
- Trade series
Show a series of profitable and unprofitable transactions
- Equity chart
Show chart of account funds
- Equity
Show account funds
- Realized P/L
Show realized profit
- Positions count
Show number of positions
- Max day loss
Show maximum loss per day
- Day series
Show a series of profitable and unprofitable days
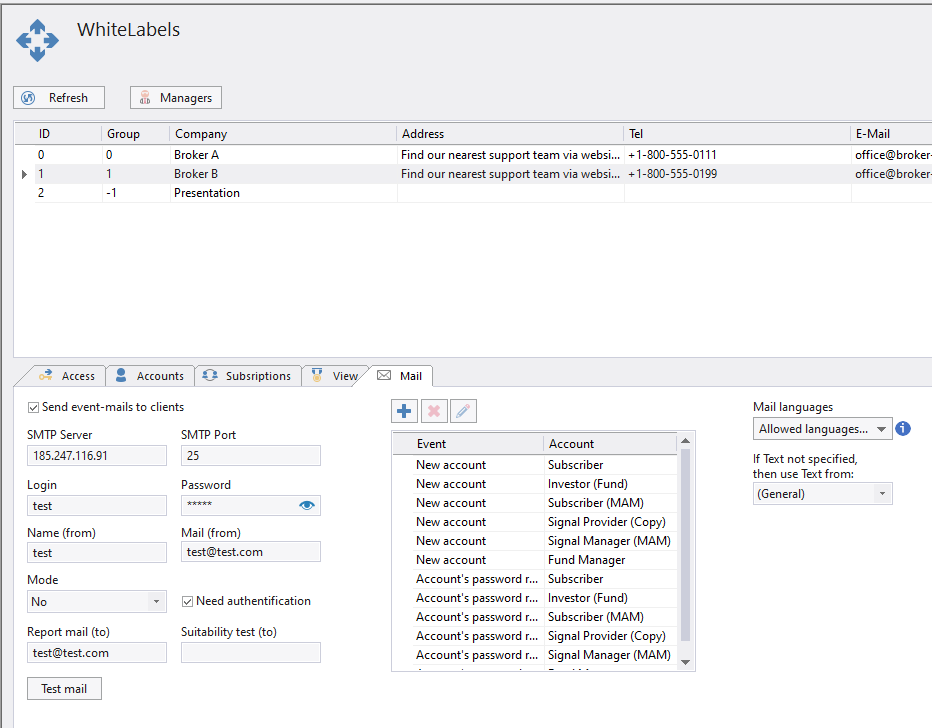
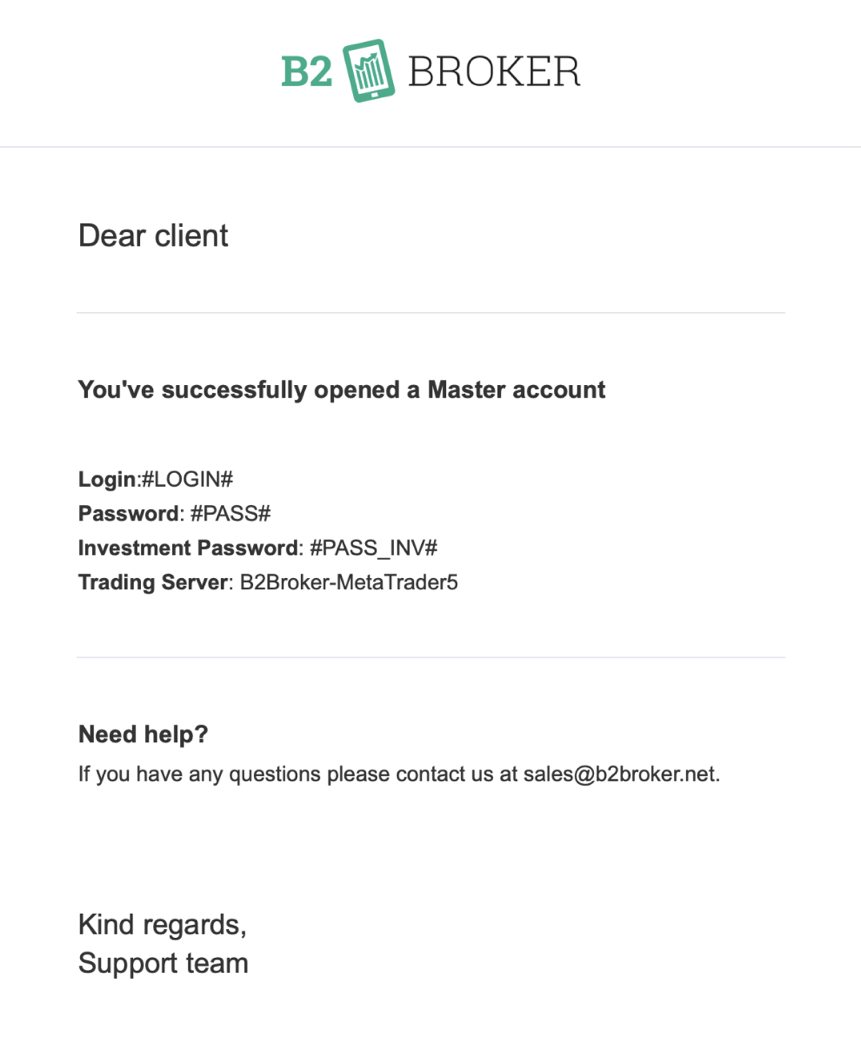
On this page you can configure the platform to send e-mails to clients automatically after an account is created or other client’s actions are made.
To do so, enter the SMTP Server data in the form on the left.
After clicking the plus icon, you can choose the account types and emails you want to send to these accounts.
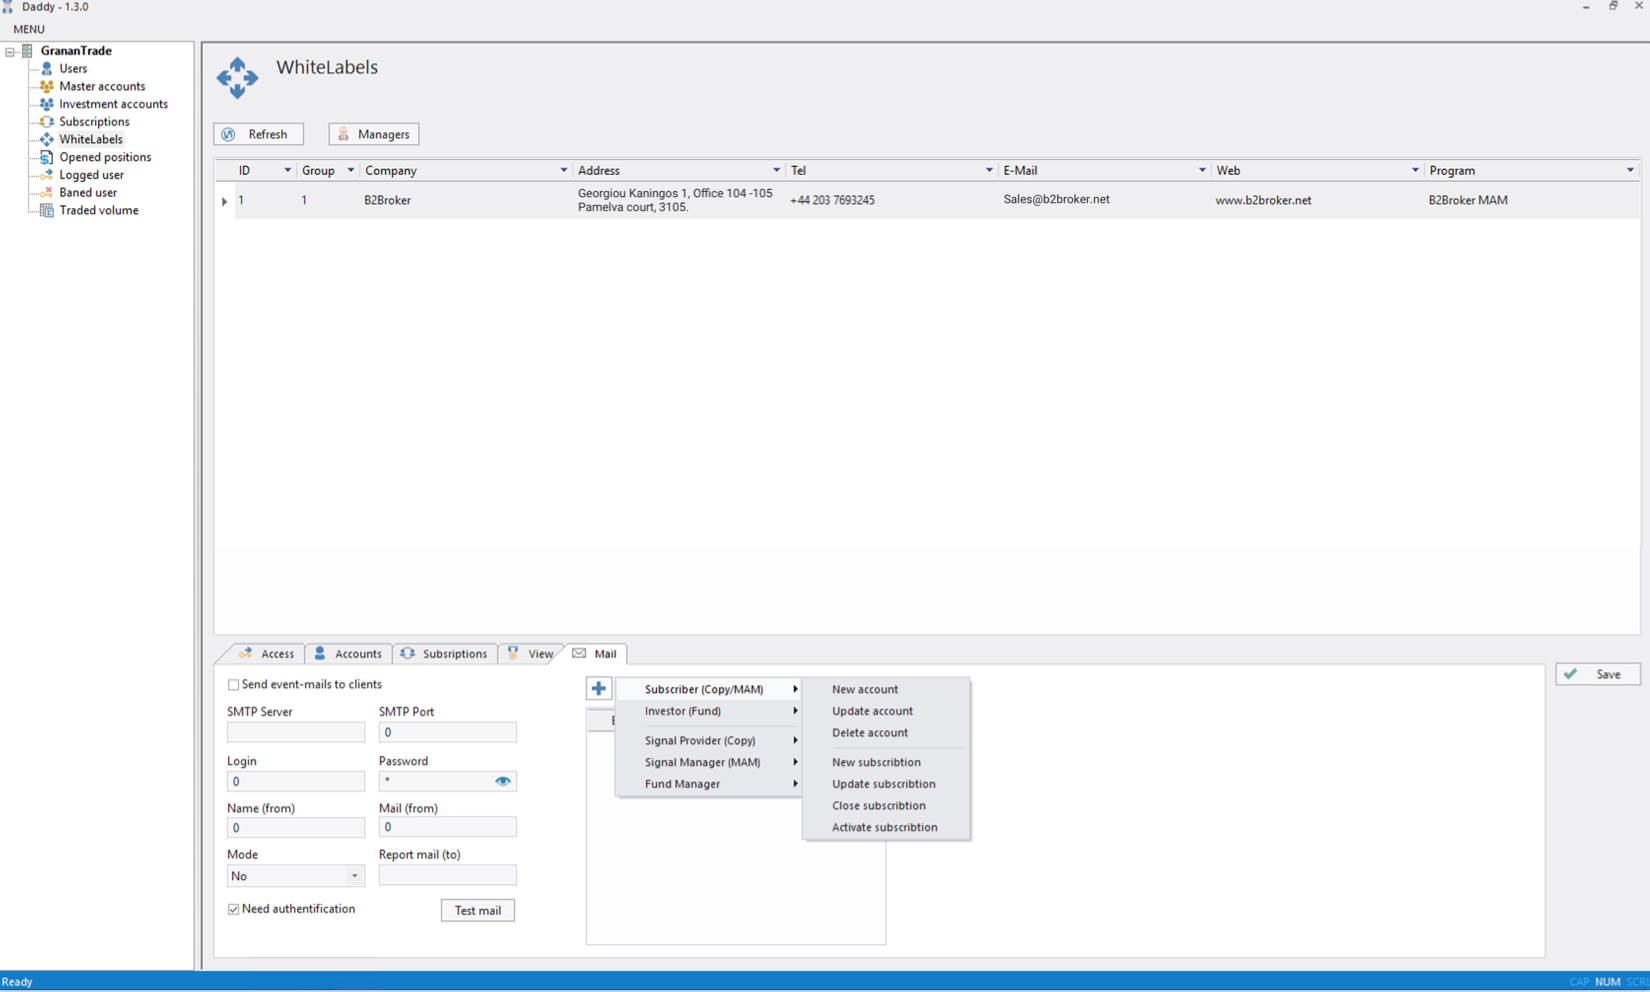
After clicking the letter and the pencil icon, you will be redirected to the screen where you can insert HTML email template.
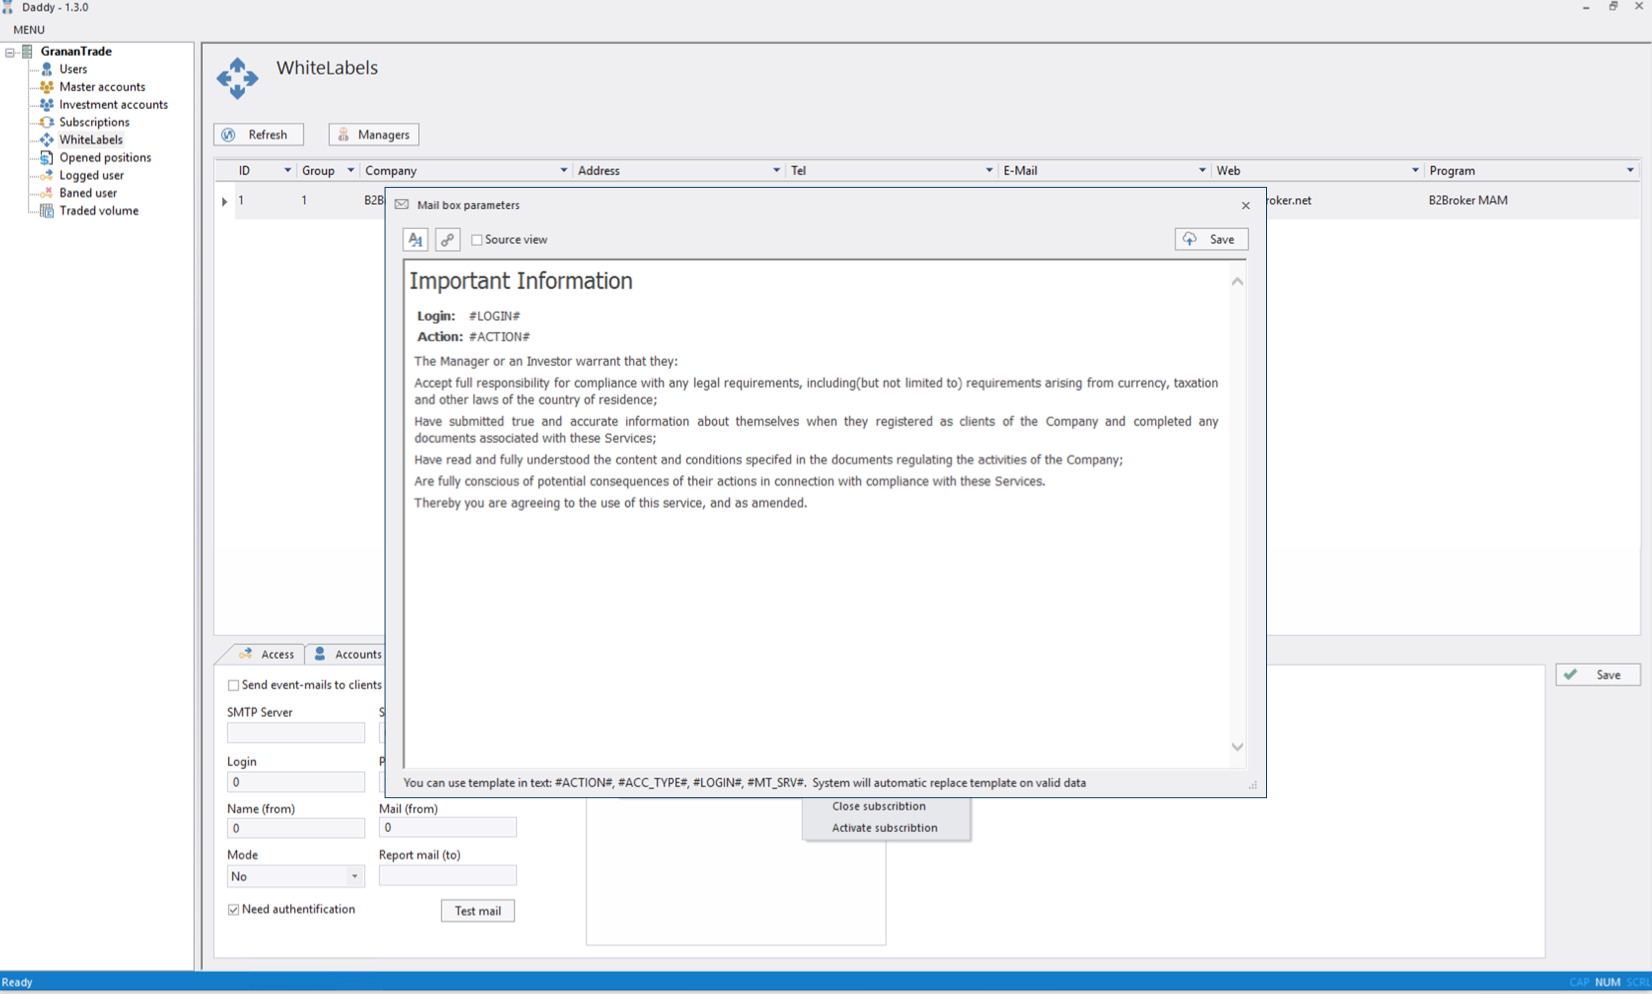
Below you can see the basic email template. You can edit it for any Whitelabel or broker.